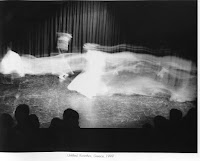
To develop:
-increase brightness/contrast
-exposure
-saturation
-B/W?
-caption: shutter speed? -and- what does it say, or what is it?

12 November 2019
04 November 2019
PROJECT #8C: LIGHT WRITING
DIRECTIONS:
1. Do this outside at night, or in darkness.
2. Use a small light source (pen light/sparkler/phone screen on bright/etc.)
3. Slow your shutter speed to a very slow time (1sec, 5sec, 10sec, 20sec, 30sec, BULB...).
4. Position the camera on something sturdy so it will not move when the shutter is open.
5. Have someone, or yourself, aim the light at the camera.
6. When ready, snap the picture (open the shutter) and write the word/phrase/something in the air with light source.
7. Start at "1" on the list.
8. Enjoy the process.
THE LIST:


Light writing APP for Android. CLICK HERE.
More light writing APPS. CLICK HERE.
SITES FOR REFERENCE:
A PDF guide to light writing. CLICK HERE.
Possible light tools. CLICK HERE.
Light writing image search. CLICK HERE.
How to light write. CLICK HERE.
Light graffiti. CLICK HERE.
Light writing on Tumblr. CLICK HERE.
Here is another way to make a photograph with light writing. CLICK HERE.
Pablo Picasso draws with light. CLICK HERE.More light writing APPS. CLICK HERE.
SITES FOR REFERENCE:
A PDF guide to light writing. CLICK HERE.
Possible light tools. CLICK HERE.
Light writing image search. CLICK HERE.
How to light write. CLICK HERE.
Light graffiti. CLICK HERE.
Light writing on Tumblr. CLICK HERE.
Here is another way to make a photograph with light writing. CLICK HERE.
Pixel Stick. CLICK HERE
Skeleton skateboarder. CLICK HERE.
HOW TO SHOOT LIGHT TRAILS HERE.
(Possibly) helpful videos for further clarification:
=


STUDENT EXAMPLES:


30 October 2019
PROJ #8: INTENTIONAL MOTION BLUR (Shutter Priority)
RATIONALE: To make the same photo TWICE at two different shutter speeds to capture TWO DIFFERENT amounts of intentional motion blur.
*************************DIRECTIONS FOR IN CLASS & HOME:
1. Complete the worksheet photo subjects as explained.
2. Write down the shutter speed (or pre-set 'category') in the "SHUTTER SPEED 1" & "SHUTTER SPEED 2" columns.
3. Remember: you are making TWO photographs of EVERY subject. The point is to capture TWO different amounts of motion blur.
CAMERA SETTINGS FOR BOTH IN-CLASS & HOME:
1. Slow your shutter speed as you did for the worksheet practice photos.
2. If you have a DSLR camera w/an "S" setting...set it to that "S" setting. Choose the shutter speed you want. (This is called "SHUTTER PRIORITY," and the camera will adjust the other settings automatically.)
3. With your partner, photograph the following on the WS. :
HOMEWORK: Finish "AT HOME" side of the worksheet.


EXAMPLES TO GET YOU THINKING/PLANNING...


Subscribe to:
Posts (Atom)