11 January 2019

MOSAIC (Practice & Home: Two Images)

TUESDAY, January 15

1. Finish assembling & developing the PRACTICE mosaic.
2. Develop & assemble the HOME mosaic.
3. POST each to one post on your BLOG.
4. Drop both MOSAICS (two!) to DRIVE.
5. Check that all your work is SCORED.
-If an assignment is not scored, email me the specific assignment(s):  TuHSPhoto@ttsd.k12.or.us

FOR EACH MOSAIC:
1. Make at least NINE photos
2. Develop each (cross process, BW, etc.)
3. Assemble into the MOSAIC TEMPLATE
4. Slice precisely/cleanly/specifically for each element. 
4. Post to BLOG & drop to DRIVE.


PROJECT #17: MOSAIC/GRID PORTRAITS

DIRECTIONS FOR CLASS TODAY:
1. Make enough photographs of your subject to assemble a grid portrait of that person. 
    *Play with (slight) distance of camera to subject, the focus of the subject, etc. 
2. Develop each of the NINE images in some way (B/W, cross process, tint, light leak, etc.)
3. Assemble the photos in the template -- CUT OFF parts of the photos as needed (Marquee tool + Delete)
4. Flatten & save as .JPG
5. Drop your DEVELOPED PRACTICE mosaic to the DRIVE.
6. Post to your blog in a post titled "MOSAIC PRACTICE"

DIRECTIONS FOR HOME:
The same as in class, but choose a different subject matter. 
Complete a GRID mosaic, or branch out to a FREEFORM mosaic.
Bring all photos to next class. 
MINIMUM DUE FOR EACH MOSAIC:
Assemble (in Photoshop) TWO grid/mosaic portraits - each comprised of at least NINE images. 
Make one grid & one mosaic - each of a different subject.

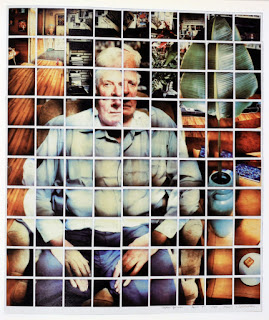
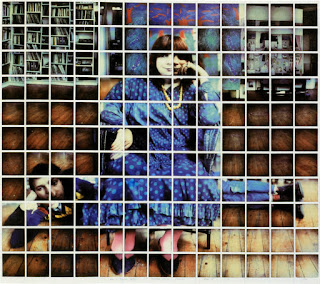
GRID MOSAIC EXAMPLES:


FREEFORM MOSAIC EXAMPLE: