17 May 2019

PROJECT #13: INFRARED (One class period activity)

DIRECTIONS:
1. Make 10 images that have green foliage in the composition.
2. Put a human element in at least five of the images.
3. Process five of the ten image in the INFRARED process below.
4. Post to your blog.
5. Drop to the drive.
6. Title the post: "INFRARED"
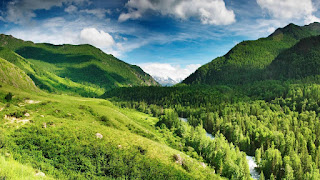
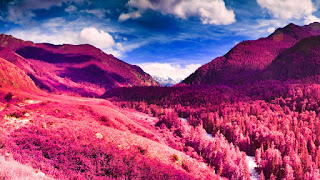
 

THE PROCESS:
1. Duplicate the background layer.
2. On that duplicate background layer, go to IMAGE+ADJUSTMENTS+INVERT. 
3. Change the BLENDING MODE (at the top of the Layers palette) of that new duplicate layer to COLOR.
4. Create a NEW ADJUSTMENT LAYER + CHANNEL MIXER. (Do this by going to the LAYER menu, NEW ADJUSTMENT LAYER)
5. Adjust the CHANNEL MIXER levels to the following:


OUTPUT CHANNEL RED
RED=0
GREEN=0
BLUE=100


OUTPUT CHANNEL GREEN:
RED=0
GREEN=100


BLUE=0

OUTPUT CHANNEL BLUE:
RED=100
GREEN=0
BLUE=0

*These are the basics. Adjust levels as necessary for your individual photographs


6. Add  IMAGE+ADJUSTMENTS+PHOTO FILTER (ETC.) to enhance your photo to your preferences.


The Day Wonderland Stood Still... from Bruce W. Berry Jr on Vimeo.

16 May 2019

PROJECT 12B: LIGHT WRITING

DIRECTIONS: 
1. Do this outside at night, or in darkness. 
2. Use a small light source (pen light/sparkler/phone screen on bright/etc.)
3. Slow your shutter speed to a very slow time (5sec, 1 sec, 10sec, 20sec, 30sec, BULB...). 
4. Position the camera on something sturdy so it will not move when the shutter is open. 
5. Have someone, or yourself, aim the light at the camera.
6. When ready, snap the picture (open the shutter) and write the word/phrase/something in the air with light source. 
7. Start at "1" on the list.
8. Enjoy the process. 

THE LIST:


IDEAS:
Long Exposure Ideas. CLICK HERE.

APPS FOR DOING THIS WITH PHONE:
Pablo Picasso draws with light. CLICK HERE.
Pixel Stick. CLICK HERE
Skeleton skateboarder. CLICK HERE.
HOW TO SHOOT LIGHT TRAILS HERE.


(Possibly) helpful videos for further clarification: 


=


STUDENT EXAMPLES:


15 May 2019

EC: FOUND FACES

DIRECTIONS. Observe the world around you for the next two days. Make photographs of hidden 'faces.' Bring to next class. Each photo will earn one point of extra credit. 

This is an exercise in observation and seeing. It is a bit silly, yes, but that never hurt anyone.
More importantly, it will exercise your 'eye,' and allow you to practice noticing the world around you.
The photos might be macro, wider perspective, or anywhere in between.

NOTE: take time to focus your photos correctly.


13 May 2019

BLUR, Part 1 (Practice+)

**EXAMPLE POST** (but with all ten PAIRS of photos from the list)

-Dev to B&W
-Adjust EXPOSURE (+bright/contr)
-post as PAIRS
-caption: SHUTTER SPEED
1/60
1/4