06 December 2021

PROJECT #9: MOTION BLUR, Pt. 1 (Shutter Priority)


RATIONALE:
To explore MANUAL functions of a camera, and gain control of camera settings.

DIRECTIONS:
1. Download (if needed based on your phone capabilities, and if you are able to) one of the following apps:

645 PRO Mk III

2. Slow your shutter speed to a fraction of a second (1/60, 1/30, 1/8...)
3. With a partner, make the photos from the following list:


CAMERA MOVEMENT:
1. Panning - you move the camera in the same direction as your subject. 
2. Still - the camera is still but your subject is moving. 
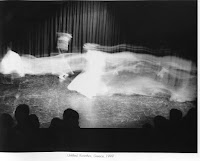
THE GOAL:
To make images that have subject matter that is in motion blur while ALSO containing something that is NOT BLURRED.

We need to be able to rest our eye ON SOMETHING THAT IS NOT BLURRED.

Note: If you have a DSLR camera w/an "S" setting...set it to that "S" setting. Choose the shutter speed you want. (This is called "SHUTTER PRIORITY," and the camera will adjust the other settings automatically.)


EXAMPLES TO GET YOU THINKING...


SHUTTER SPEED


SHUTTER SPEED APP (For next class)

SHUTTER SPEED APP FOR YOUR PHONE CAMERA.

If your phone camera is your main device, you will need a 'shutter speed app' for your phone camera. 

If you have an Android phone, you may already have shutter speed control, but make sure to check.

The shutter speed numbers often look like fractions, or simply list a range of denominators.


MOST IMPORTANT FEATURE TO LOOK FOR IN THE APP YOU GET: 

You need an app that will give you a range of slow shutter speeds (1/8", 1/4", 1/2", 1", 10", 30", 60", Bulb)

In the app, the shutter speed might not look like a fraction. It may just be a listing of the denominator of the shutter speed fractions. (ex: 250, 125, 60, 30, 15, 8, 4...).


For iPhone, if you can, get Slow Shutter Cam (Click here)

Other iPhone apps that are available, and would be useful for our purposes:


*These two are more expensive, but give you a lot of control that other apps do not. 


There are free apps, but most allow a limited number of photographs before having to purchase, and/or do not include the full range of shutter speed. 

EXPOSURE TRIANGLE (Review)


WHAT IS EXPOSURE?


APERTURE


SHUTTER SPEED


ISO

29 November 2021

#8: SABATTIER (5+)

DIRECTIONS FOR DEVELOPING YOUR PHOTOGRAPHS:

For each photo...
1. Take photo to BLACK & WHITE.
2. Adjust the BRIGHTNESS + CONTRAST to enhance (deepen and brighten) the values in the photograph.
3. "SAVE AS" the image, and add "BW" to the end of the file name so you do not save over the original. 
4.  Post all images.

NOW...

1. Choose five of your photos that have the HIGHEST CONTRAST.
2. For each photo, OPEN the photo.
3. Create a DUPLICATE LAYER of the background image (Layers palette).
4. Change BLENDING MODE to "EXCLUSION"
5. Open CURVES and adjust the histogram line to a "W" or an "M" to produce a SOLARIZED/SABATTIER image with MACKIE LINES.

You need to post...

5+ photos processed into Sabattier.
Post the original next to the processed image.
(That is 10+ photos total that are posted)

SABATTIER EFFECT.
Sometimes known as "solarization."


Mackie Lines. CLICK HERE.


18 November 2021

#7: PHOTOGS' CHOICE #1

#7: PHOTOGS' CHOICE #1

DIRECTIONS.
Choose a doable project to photograph by the first class after Thanksgiving break.
The subject, method, style, etc. are entirely your choice.
Keep it simple...get complex...revisit a project we have done...do something 'new'...


PART ONE - TEXT ENTRY IN CANVAS:

In the text entry in Canvas, write the following items:
1. The subject matter (the 'what')
2. The place you will photograph (the 'where')
3. The time of day you will photograph (the 'when')
4. The kind of light you anticipate existing in the location when/where you photograph (describe the light as if you are explaining it in a story. What do you think it will look like?) 
5. What draws you to photographing your project? (What excites you about the idea?)
6. Other thoughts about your project...

PART TWO - THE IMAGES:

To get credit for the project, make 12+ images that meet your original idea & methods (the written entry for Part One).


GET AN IDEA FOR YOUR PROJECT:

Maybe start here: 
https://rb.gy/ubzg1t

Or the Student Art Guide (This is a great resource for now & your future!):

📸 📷

15 November 2021

PROJECT #6: MULTIPLE EXPOSURE (8+)

PROJECT #6: MULTIPLE EXPOSURE (8+)

MULTIPLE EXPOSURE

DIRECTIONS: Using your silhouettes & direct side-light photos, and other photos, combine your photos into various multiple exposures. Use BLEND MODE in the Layers Palette, to blend the various images in your layers. Erase or cut away parts of photos if needed...The beauty is in the unexpected.

Make EIGHT+ multiple exposure images.
More will earn extra credit. 

********************************
Sara Byrne. CLICK HERE.
Christoffer Relander. CLICK HERE.
Dan Mountford. CLICK HERE.
Matt Wisniewski. CLICK HERE.
Nacho Oraechea. CLICK HERE.


Annie Kornberg


Nina Coleman


Hyesung Yu


Erik Radzik

Stefan moses.
Duane Michaels
Arturo Bragaglia
Student Work
Student work.
Student work.
Student work.
Student work.
Student work.

 Hohman.

03 November 2021

PROJECT #5b: LIGHT, Part 2 (Direct Side Light Portraits)

DIRECT SIDE LIGHT:

*NOTE: The shadow(s) for these portraits should be dark

1. The light should illuminate your subject from an obvious side/direction.
2. Make FIVE+ photographs with this method.
3. If using the same person for all five images, move the light (or the subject) so that each photo is illuminated differently. The differences might be slight, or dramatically obvious. Either way, you'll have a 'different' photo, and it is likely that one will be preferable over another (that's the point of doing multiples).

GENERAL NOTES:
*An obvious and distinctly dark shadow should be visible
**An obvious direction from where the light is emanating (FROM ONLY ONE SIDE)


 .