20 September 2023

PROJECT #2: MACRO (Aperture)

DIRECTIONS:
1. Make 10+ in class macro images of texture, surfaces, small objects, etc. 
2. Make 10+ at home macro images of texture, surfaces, small objects, etc. 
---for a total of 20 images minimum.

3. Develop/process images in Photoshop (Lightroom is on the horizon)
4. In class, we will determine the final number to post to your site/blog (if the site is working)

EXTRA CREDIT CHALLENGE OPTIONS:
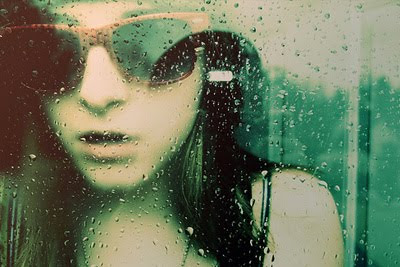
  • Photo of water droplets where the background is visible THROUGH THE DROPLET.
  • Photo of the iris of an eye (human or animal) - Be careful. 


12 TIPS FOR MACRO PHOTOGRAPHY ON YOUR PHONE

WHAT IS MACRO?

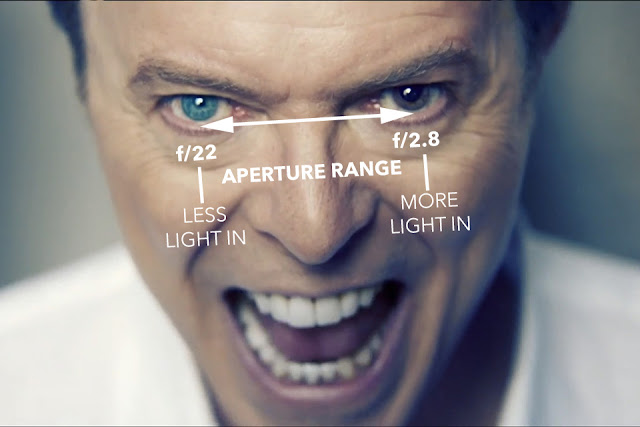
APERTURE=the opening into the camera.
APERTURE also allows you to control what is called DEPTH OF FIELD. 
DEPTH OF FIELD refers to how wide an area is in focus.  


The purple area represents what is in focus, 
and the lenses show you the aperture setting needed for THAT particular sliver of focus. 

MACRO photography refers to close-up photography.
A lot of macro photography is done with specialty lenses.
However, you can probably make them with the macro setting that is included on most cameras. 

This is the symbol that denotes close-up/macro mode on point-and-shoot cameras:


DIRECTIONS FOR DSLR CAMERAS: 
A.  If you have a DSLR, you might have a MACRO setting (the flower). If so, use that setting. If not...

1.   Set your mode to "A" for "aperture priority." 


2.  Then, set your aperture to as WIDE OPEN a setting as possible. That means, the SMALLEST f/stop number. Look at these aperture sizes in relation to the numbers below them:


Notice how the smaller number, f-1.4, is the WIDEST OPEN aperture setting.
This will give you the smallest sliver of focus possible with your lens (small/shallow depth of field).

3. If you are in Aperture Priority setting, your camera will then set the shutter speed to compensate for the wide open aperture. 

B. If you are working with a point-and-shoot camera, or a phone camera:
1. Set your camera mode to the "macro" function: 

2. If your phone does not have a macro setting, experiment with moving the a bit farther away from the subject, but zooming in a bit. It will take some adjusting, but you can get it.

EXAMPLES/INSPIRATION

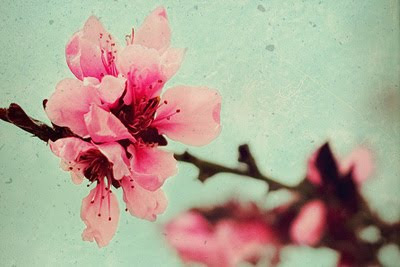
Some creative macro:

18 September 2023

PROJECT #1: PINHOLE NEGATIVES & POSITIVES (In class assignment)

HOW YOUR EYES SEE:


HOW CAMERA OBSCURA/PINHOLE SEES:
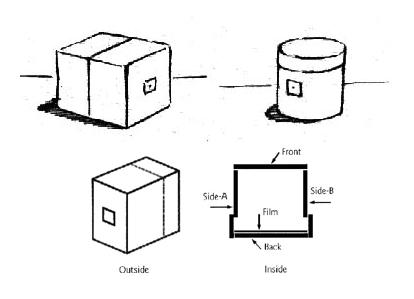
The "can-era" you will be using is a small camera obscura. 


DIRECTIONS.  
As instructed in our darkroom & classroom tutorials, do the following:

1. Make ONE+ image in the classroom (the control environment of 2min 36sec exposure time).
-then-
2. Make TWO+ images outside the classroom/building

*Note: When you take your 'canera' (Ha! Yes, I said it again. ;) outside, the exposure time will be significantly reduced. 

3. When we are finished with the THREE+ images, we will photograph each image and pull into Photoshop to inverse and 'develop' the positive images. We will have a tutorial for this toward the end of the project. 

IN THE DARKROOM...
1. Put paper in the can. Shiny side of paper facing the pinhole.
2. Lid the can, tape the possible light leaks with black electrical tape. 
3. Return to classroom.
4. Place camera on surface w/pinhole facing you. 
5. Sit/stand in front of pinhole.
6. Remove tape and make an exposure for 2m36sec.
7. After exposure time, cover pinhole w/tape.
8. Return to darkroom and take the paper through the chemical+water bath process. 
9. Hang image to dry for minimum TWO hours. 
10. Come back and collect your image.


EXAMPLES & RESOURCES:


GALLERIES.
Pinhole.org (HERE)
Pinhole @ Photo.net (HERE)
Worldwide Pinhole Day (HERE)
An in depth site about pinhole photography past and present (HIGHLY recommended)

CLICK HERE.

HISTORY OF CAMERA OBSCURA
The pinhole camera is based on the principals of a “camera obscura.” (Camera = Latin for “room” - - Obscura = Latin for “dark”)

The earliest mention of this type of device was by the Chinese philosopher Mo-Ti (approx. 500 BC). He formally recorded the creation of an inverted image formed by light rays passing through a pinhole into a darkened room. He called this darkened room a "collecting place" or the "locked treasure room." Aristotle (384-322 BC) also understood the optical principle of the camera obscura. He viewed the crescent shape of a partially eclipsed sun projected on the ground through the holes in a sieve, and the gaps between leaves of a plane tree. In the 16th century, Leonardo da Vinci is credited with giving a description of the pinhole camera more or less as we think of it today.

CAMERA OBSCURA:


pinholediagram

A BASIC CAMERA:
A pinhole camera is easy to build. The camera can be made from almost anything-from tin cans, shoe boxes, and as Ralph Howell showed you in the video, fruits and vegetables.


When you make your first camera from scratch if you make it like a well made shoe box you can't go too far wrong. The picture above is a VERY simplified diagram of how the parts go together. The actual size of the camera is up to you. As long as you make the 'back' fit snugly onto the 'front' the camera will work.

How does a pinhole work? We see things because light rays reflect off of them and these reflected rays form an image on the retina. A camera is a mechanical eye, so it might be useful to think of it in these terms; we use the term 'ray' of light when we talk about using lenses to form an image. We use the term 'beam' of light when we talk about making images with a pinhole. The difference is one of dimension. A ray of light is defined as a line of light, while a beam of light is defined as a bundle of parallel rays.

Light falling on an object reflects off in all directions. When a lens is used to make an image rays from the same point on the object are reflected to its surface, this forms a cone of light. As the rays pass through the lens they are bent or refracted and as they are made to to disperse, they are again formed into a cone, the diminishing end of which is the point of focus...got that?

Consider this...a photograph is really composed of points of light that vary in size. If the points are too large the image will not be sharp. What this means is that pinhole images aren't as sharp as images made with a lens, and that the size of the pinhole will determine how soft or sharp your images are...as well as determining the time you'll need to expose the film or paper for…


"World’s Largest Camera Big Enough to Hold an Airplane"


The story and more pictures HERE.


A homemade "pinorama" camera HERE.
A great site for pinhole photogs HERE.
And a site for pinhole resources HERE.
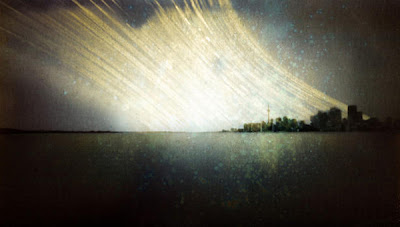

The shutter of Michael Chrisman’s pinhole camera was open for 31,536,000 seconds.
HERE.

06 September 2023

Welcome!

 Welcome, Photogs!

I am happy you have arrived here.

I hope something about photography has sparked your interest, and maybe this semester that spark will turn to flame, and a deeper appreciation of the art and science of Photography.

Our class relies on your in class work, and the images you make outside of class. 

Here are some of the best ways students have found to be successful in our beginning photography course:                 
                                                                                                   
1. Work thoughtfully & mindfully so others may do the same.
2. Be prompt, on-time, present and remain in the studio.
3. Listen carefully and be courteous when others are talking or demonstrating.
4. Always use time productively.
5. Insure your language, comments and projects appropriately follow TuHS school handbook guidelines.
6. Demonstrate a positive approach to assignments.
7. Positively receive feedback and critique.
7. Pursue challenging solutions & strive for high standards of achievement.
8. Keep track of – and clean up – materials, and come to class prepared to work.
9. Demonstrate personal initiative and problem solving ability.
10. Actively participate intelligently in individual and group activities and critiques.

I am enthused about taking you from point A to point B. Each of you comes to the class with a different starting point, and will grow/learn from there. That is inherently exciting. I am honored to be a part of your education, and believe you can go far. 

🅗🅔🅡🅔 🅘🅢 🅣🅞 🅨🅞🅤🅡 🅖🅡🅔🅐🅣🅝🅔🅢🅢!
Hohman
📷


30 May 2023

PROJECT #13: SABATTIER (Mini/in-class project)


©️ The School of Light


DIRECTIONS FOR DEVELOPING YOUR PHOTOGRAPHS:

STEP ONE:
1. Take a photo to BLACK & WHITE.
2. Adjust the BRIGHTNESS + CONTRAST to enhance (deepen and brighten) the values in the photograph.
3. "SAVE AS" the image, and add "BW" to the end of the file name so you do not save over the original. 

STEP TWO:

1. Create a DUPLICATE LAYER of the background image (Layers palette).
2. Change BLENDING MODE to "EXCLUSION"
3. Open CURVES and adjust the histogram line to a "W" or an "M" to produce a SOLARIZED/SABATTIER image with MACKIE LINES.

Submit for credit:

5+ photos processed into Sabattier.
Post the original next to the processed image.
(That is 10+ photos total that are posted)

SABATTIER EFFECT.
Sometimes known as "solarization."


Mackie Lines. CLICK HERE.


22 May 2023

PROJECT #12: GOLDEN HOUR PORTRAITS+

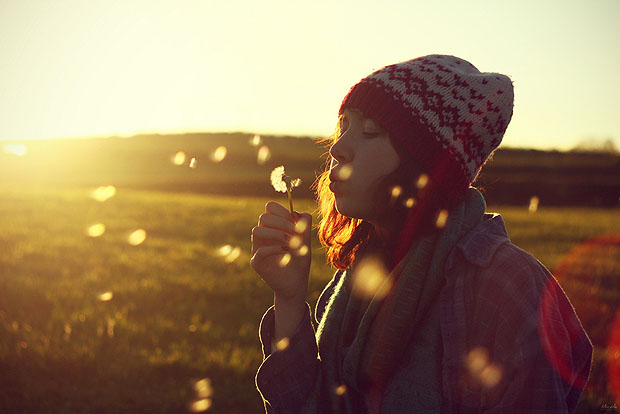
 GOLDEN HOUR: The hour* after sunrise and before sunset.

*Depending on where you are on Earth, the hour will be longer or shorter than an actual 'hour.' 


OUR FORECAST THIS WEEK: Sunrise & sunset times (CLICK HERE).

DIRECTIONS
This week(end), make 18+ images during the golden hours.

- 9+ photographs = portraits (humans)
- 9+ photographs = subject of your own choosing (animals, flowers...)


RATIONALE 
To observe and record the type of light that occurs during the golden hours. 

EXTRA CREDIT
Two+ morning magic hour photographs (can be the same morning)


EXTRA TIPS, ETC. 


Apps to find the hour(s) in your location:

PROJECT #11: INFRARED (In-class/Photoshop


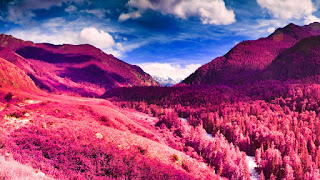
PROCESS:
1. Duplicate the background layer.
2. On that duplicate background layer, go to IMAGE+ADJUSTMENTS+INVERT. 
3. Change the BLENDING MODE (at the top of the Layers palette) of that new duplicate layer to COLOR.
4. Create a NEW ADJUSTMENT LAYER + CHANNEL MIXER. (Do this by going to the LAYER menu, NEW ADJUSTMENT LAYER)
5. Adjust the CHANNEL MIXER levels to the following:

OUTPUT CHANNEL RED
RED=0
GREEN=0
BLUE=100


OUTPUT CHANNEL GREEN:
RED=0
GREEN=100
BLUE=0

OUTPUT CHANNEL BLUE:
RED=100
GREEN=0
BLUE=0

*These are the basics. Adjust levels as necessary for your individual photographs


6. Add  IMAGE+ADJUSTMENTS+PHOTO FILTER (ETC.) to enhance your photo to your preferences.


The Day Wonderland Stood Still... from Bruce W. Berry Jr on Vimeo.

18 May 2023

PROJECT #10: SYMMETRY & ASYMMETRY (In Composition) (In-class assignment)


SYMMETRY = the quality of being made up of exactly similar parts facing each other or around an axis

SYMMETRICAL = made up of exactly similar parts facing each other or around an axis; showing symmetry.


Image by Tokkes

DIRECTIONS.
With your partner, make FIVE PHOTOS with your partner in the center of a composition that is horizontally symmetrical.
Each partner makes their own five photos (of the other partner). 
You are allowed not to show your face if you so choose. 

FURTHER THINKING/SEEING:
RESOURCE LINKS
https://www.aminus3.com/threads/what-is-symmetry-in-photography/

10 May 2023

PROJECT #9: RULE of THIRDS (Composition)

HW (In class, if you have submitted 'Leading Lines'):
1. Turn on the 'Show Grid' function in your camera.
2. Make EIGHT+ photographs using the rule of thirds composition method.


-A person or pet should be the subject matter for half of the images.
-EIGHT photos are due for credit for the assignment.
-Each photo is worth ONE point (8 points total)
-Each photo that also includes a leading line to your subject matter will earn 100% extra credit (Example: if you include a leading line in each photo, your project will earn 16/8 points)


******************************************

THE FIBONACCI SEQUENCE & THE GOLDEN MEAN
In visual art, Fibonacci numbers are sometimes used to determine the length or size of content or formal elements.

LINKS
A site that contains an explanation of the Golden Mean and its relationship to the rule of thirds HERE
Another site HERE
An explanation of the Fibonacci sequence HERE.
An animation of the Fibonacci sequence HERE.
Another explanation of the Fibonacci sequence HERE.
A site outlining the mystery of the Fibonacci sequence HERE (Really good!)


NOW, RULE OF THIRDS.
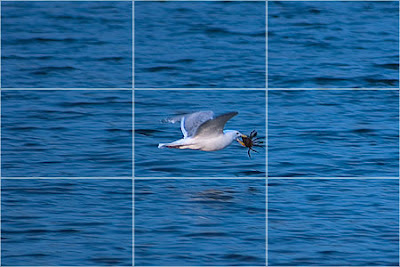
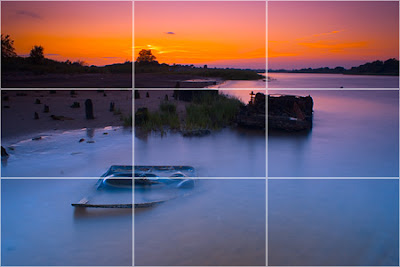
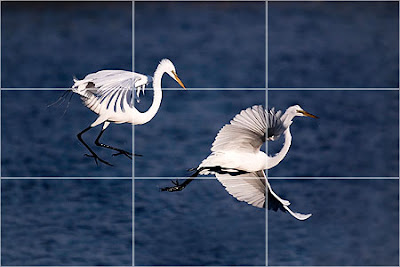
The RULE OF THIRDS is a compositional rule which is recommended for two-dimensional image making. An image could be divided equally by two vertical and two horizontal lines. In general, the four intersections of these lines will be the most interesting places for the main subject(s).

The Rule Of Thirds is a method of arranging subject matter within a two-dimensional frame to maximize a harmonious relationship between all planes of subject matter (foreground, middle ground, background). It is used by photographers, painters, film makers, television shows, etc. As one looks through the viewfinder, compositional lines are drawn (mentally) across the picture frame to divide the image into thirds both horizontally and vertically. The photographer places important elements of the composition where these lines intersect.


By placing your subject in one of the intersections, one creates a dynamic composition that allows the viewers eye to be drawn to different parts of the compostion in an ordered manner. The viewer is allowed to determine the relationship between 'close-up' subject matter and its relationship to the middle distance and background subject matters.

Click on the following titles to be taken to websites about the Rule Of Thirds:
Rule Of Thirds

The following addresses explain the Rule Of Thirds further:
Rule Of Thirds by Kodak
Rule Of Thirds by Silverlight.co.uk
A Beginner's Guide To Rule Of Thirds


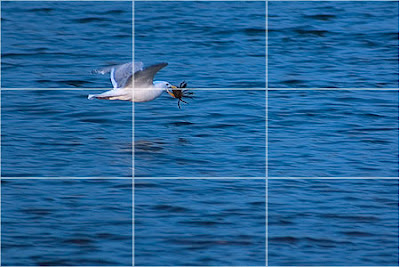
Most people will put the seagull right in the middle which is the “dead center”.


The artist places important elements of the composition where these lines intersect. By placing the subject in one of the intersections, one creates a dynamic composition that allows the viewers eye to be drawn to different parts of the compostion in an ordered manner. The viewer is allowed to determine the relationship between 'close-up' subject matter and its relationship to the middle distance and background subject matter.


RULE OF THIRDS


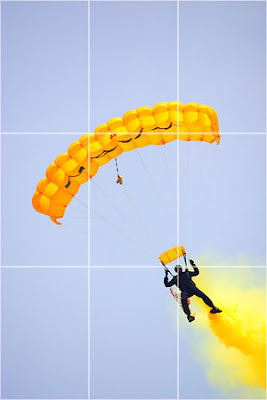
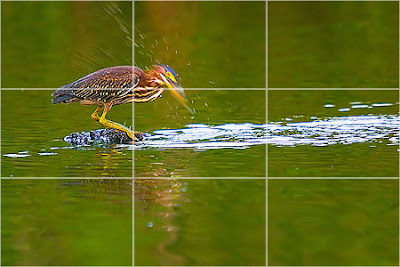
...and some more examples.